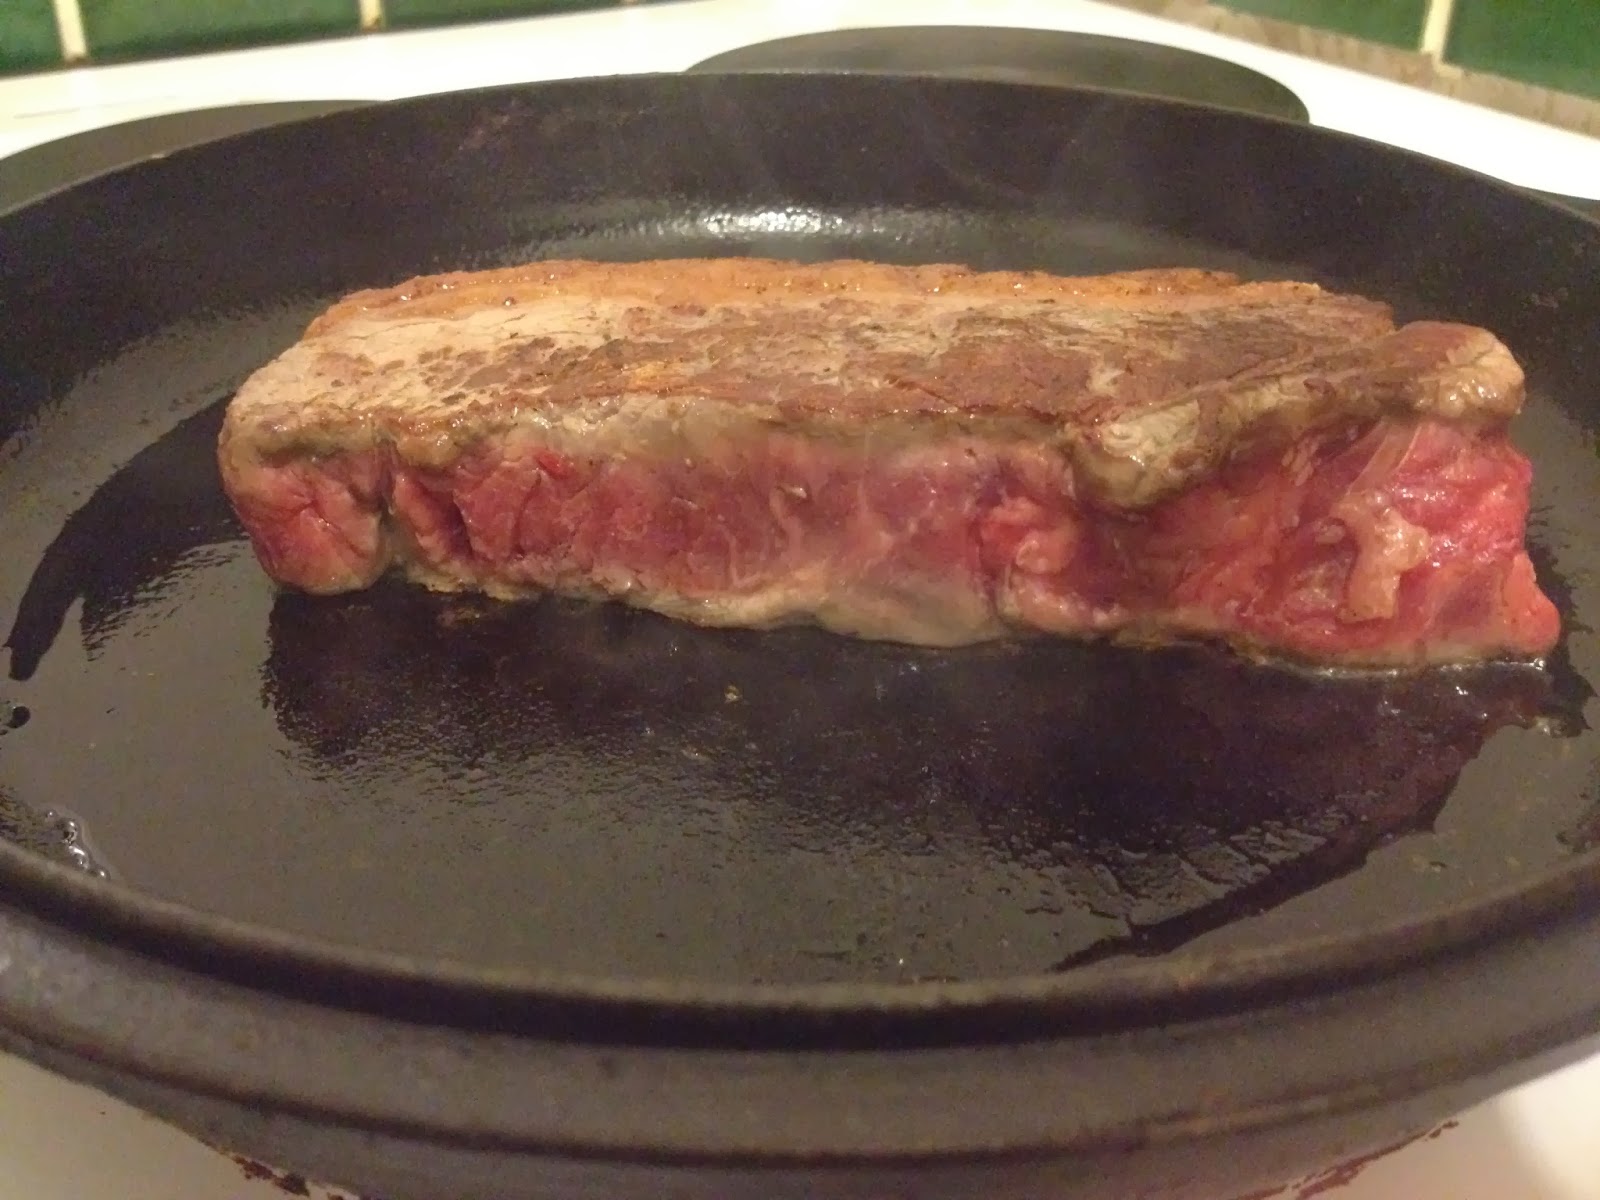
I just had to share this mouth-watering snap of last night's fillet steak, fresh from Tom Durcan's stall in The English Market.
These beauties were blotted with kitchen paper and sprinked with sea salt to help dry the meat out.
Preheat the oven to 90C/195F. Then heat your frying pan to smoking point- I use a heavy cast iron pan which means I don't need to add any oil.
Once the pan is super hot, each steak gets 2 minutes on either side. Don't move it around in the pan, just let it sit where you've placed it.
Then I popped the steaks into the oven and pushed the needle of my indespensible meat thermometer to the centre of the thickest steak. I like mine to be pink through, so aim for a centre temperature of 54C/130F. S likes some red in the centre of his, so we'll usually take his out at 51C/124F.
I know this all sounds a bit mental, but just a couple of degrees can make such a difference!
Let your steak sit for a minute or two before cutting into it. You shouldn't get any blood running out if you dry the meat beforehand and use this cooking method.
Did you know you can order Tom Durcan's meats for delivery to anywhere in Ireland and the UK? Visit their site for more details, you can also follow them on Twitter or Facebook.
Showing posts with label English Market. Show all posts
Monday, 30 March 2015
Monday, 19 January 2015
O'Flynns Meatballs & Celeriac Pasta
Ugh, Monday. At least tonight's dinner was super easy and super tasty!
I popped into the English Market and picked up 12 gorgeous pork and beef meatballs (with oregano, basil, garlic and chilli) from O'Flynns for €5 and then grabbed a celeriac from Superfruit to make the 'pasta'.
I've posted here before about this awesome low carb pasta replacement and I'm really enjoying finding new ways to use it!
I covered the meatballs in Marks & Spencer's slightly spicy Arrabiata tomato sauce and baked in the oven for 40 minutes at 180C/355F. That M&S sauce contains an incredible 4g of net carbs for the whole 340g jar- compare that to over 8g of carbs per 125g of Dolmio's Original Sauce!
For the last five minutes of cooking, sprinkle some grated cheddar cheese on top so it's all melty and delicious.
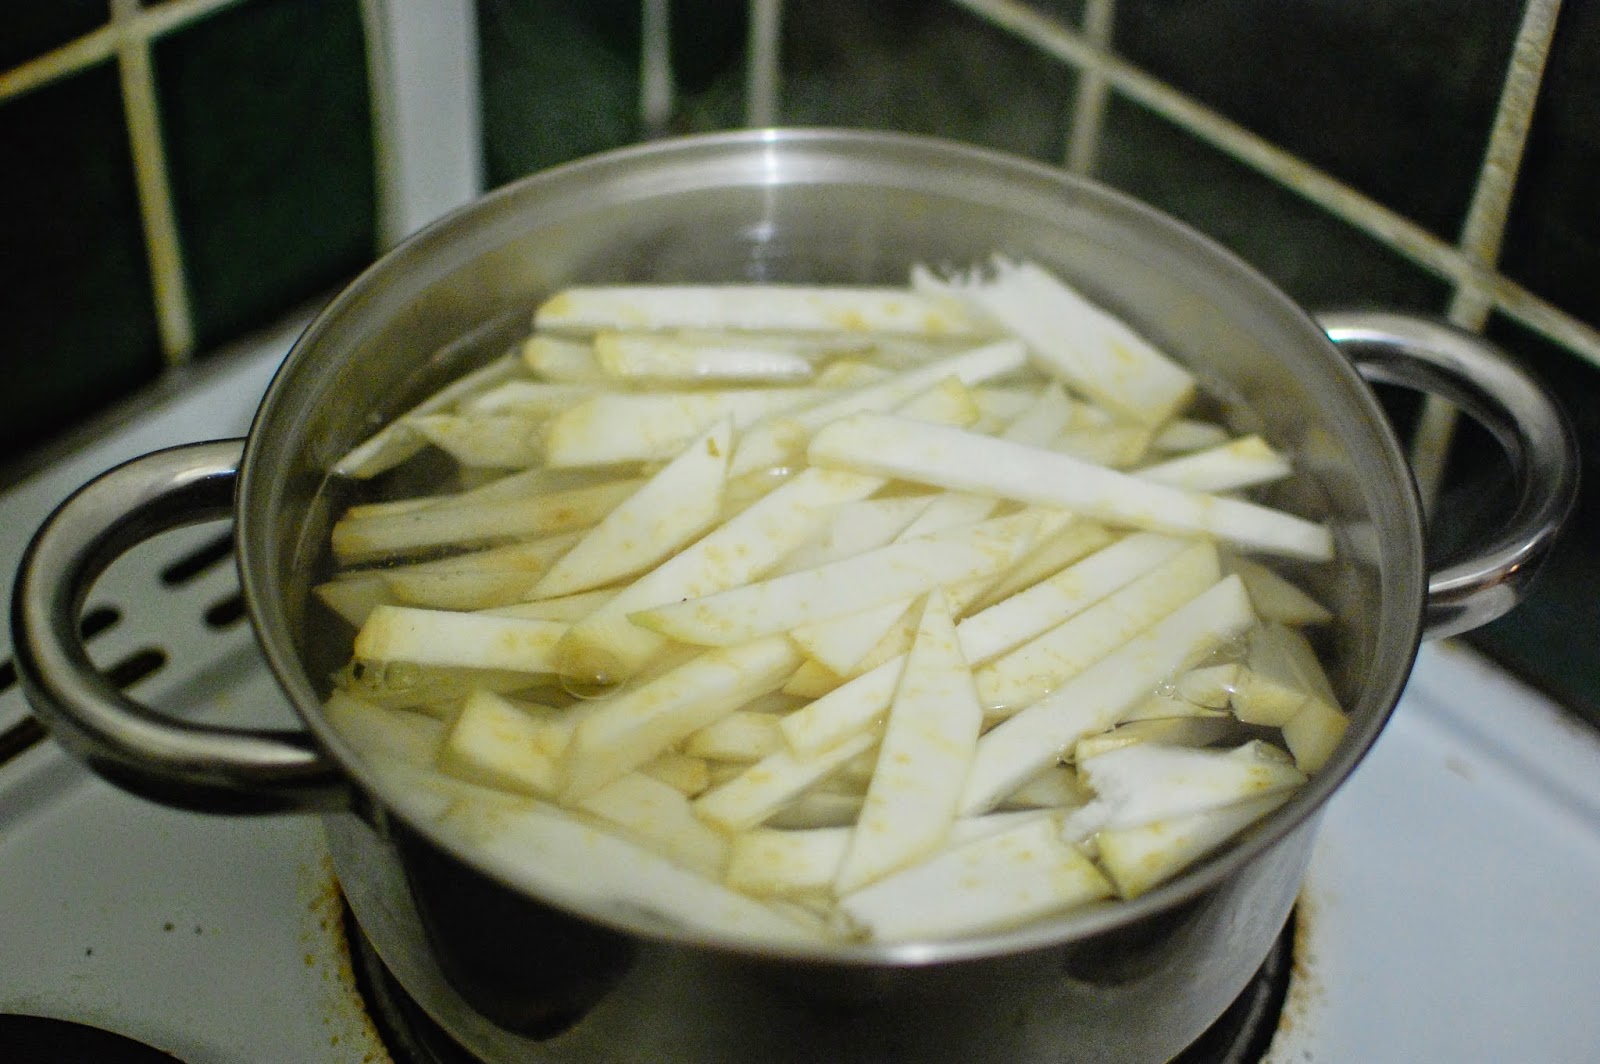
For the celeriac pasta, peel that alien-looking vegetable and slice into 1cm strips. A little less than half an average sized celeriac does the two of us nicely. At about 7g net carbs per 100g, it's a really great low carb option.
Bring a large pot of salted water to the boil and add the celeriac. It'll take about 15 minutes to become al dente- which I like- give it another few minutes if you'd prefer it slightly softer.
Serving two people, this whole delicious and comforting meal came in at under €10 and under10g of carbs each. Bargain!
Thursday, 16 January 2014
Chicken Breast On The Bone With Crispy Skin
When did we all start eating boneless chicken fillets? Was it a product of the 'good times'?
Our lives were so busy and important that buying clean-looking, equal-sized, pink chicken portions just became habit. But what were we missing out on? Moisture. Crispy Skin. Flavour.
While they're undeniably useful for certain types of meals, boneless fillets can also be horribly dry and ridiculously over-priced. Most of the time I'll use chicken on the bone, with skin on.
You can pick up five giant portions for just €7 at O'Sullivan's Poultry in The English Market (near the fountain). These chicken pieces have a wing attached, so if you like the dark meat as well as the breast meat you'll love this. The oil and spices make the skin crispy and delicious, and placing just a small knob of butter under the skin keeps the meat incredibly tender.
Just one of these will do me when having it with cauliflower mash & veg, though S likes to have two with a smaller amount of veg- you can adjust according to your own particular low-carb cravings.
Ingredients
1-2 chicken breasts per person (on the bone, with skin, and with a wing attached- if possible)
Olive oil
Schwartz Chicken Seasoning (paprika, onion, cayenne & parsley)
Butter (real, not the processed crap)
Salt & black pepper
Cooking Time
About 40 Minutes at 180C/360F
Method
1. Lay the chicken breasts out on a baking tray (deep-fill, if possible), with the skin side up.
2. Working from the bottom to the top part of the breast, use your finger or a knife to gently pull the skin out and create a space between it and the flesh.
3. Push a dice-sized cube of butter in between the skin and the flesh, and pull the skin back down around the breast. Placing the butter under the skin will make the chicken lovely and moist.
4. Using a pastry brush (or your fingers) brush the outside of the skin with a little olive oil.
You'll need about a teaspoon per portion, but I'm mad about this Filippo Berio olive oil spray- one pump per portion is all you need.
5. Sprinkle over with a pinch of salt, some black pepper (I like lots of pepper) and about a teaspoon of Schwarz chicken seasoning per breast.
If you can't get your hands on this type of seasoning, follow this link to see the basic ingredients & easily make up your own version.
5a. Massage the spices into the skin. They'll look something like this:
6. Pour a small amount (about 20ml) of cold water into the bottom of the baking tray. This will help to keep the chicken moist, and make life easier for you when you come to make the gravy.
6a. No need to cover the meat, just pop the tray into a pre-heated oven at 180C/360F degrees for about 40 minutes or until the juices run clear. The skin will be dark, and slightly crispy.
If you have a meat thermometer you can stick the probe into the thickest part of the largest breast and then forget about it until it beeps. This is my favourite way to cook. Make sure to do a spot-check on the other breasts too though- salmonella is a nasty illness.
Side Note: A poorly defrosted chicken curry led to salmonella the day before I went to see the Red Hot Chili Peppers in 2005. Six hours on a train and a day in the middle of Phoenix Park at the height of summer probably wasn't the best cure but there was no way I was missing the concert!
7. Once you've taken the meat out of the roasting tray, you can add a little hot water (~100ml) to the juices at the bottom of the tray to make a gravy. Whisk for a couple of minutes over a medium heat until blended.
If your oven tray isn't suitable to sit directly on the hob, scrape the juices into a small saucepan then add the water.
8. If you need to thicken the gravy, add a small amount of low carb-friendly Xanthan Gum while whisking. I'll usually start with a 1/2 teaspoon to begin with, and add more as/if needed.
Serve with Cauliflower Mash and your favourite veggies.
Our lives were so busy and important that buying clean-looking, equal-sized, pink chicken portions just became habit. But what were we missing out on? Moisture. Crispy Skin. Flavour.
While they're undeniably useful for certain types of meals, boneless fillets can also be horribly dry and ridiculously over-priced. Most of the time I'll use chicken on the bone, with skin on.
You can pick up five giant portions for just €7 at O'Sullivan's Poultry in The English Market (near the fountain). These chicken pieces have a wing attached, so if you like the dark meat as well as the breast meat you'll love this. The oil and spices make the skin crispy and delicious, and placing just a small knob of butter under the skin keeps the meat incredibly tender.
just look at that juicy meat under the crispy skin! Mmmmm....
Just one of these will do me when having it with cauliflower mash & veg, though S likes to have two with a smaller amount of veg- you can adjust according to your own particular low-carb cravings.
Ingredients
1-2 chicken breasts per person (on the bone, with skin, and with a wing attached- if possible)
Olive oil
Schwartz Chicken Seasoning (paprika, onion, cayenne & parsley)
Butter (real, not the processed crap)
Salt & black pepper
Cooking Time
About 40 Minutes at 180C/360F
Method
1. Lay the chicken breasts out on a baking tray (deep-fill, if possible), with the skin side up.
2. Working from the bottom to the top part of the breast, use your finger or a knife to gently pull the skin out and create a space between it and the flesh.
3. Push a dice-sized cube of butter in between the skin and the flesh, and pull the skin back down around the breast. Placing the butter under the skin will make the chicken lovely and moist.
4. Using a pastry brush (or your fingers) brush the outside of the skin with a little olive oil.
You'll need about a teaspoon per portion, but I'm mad about this Filippo Berio olive oil spray- one pump per portion is all you need.
5. Sprinkle over with a pinch of salt, some black pepper (I like lots of pepper) and about a teaspoon of Schwarz chicken seasoning per breast.
If you can't get your hands on this type of seasoning, follow this link to see the basic ingredients & easily make up your own version.
5a. Massage the spices into the skin. They'll look something like this:
you can see the knobs of butter just under the skin on each breast
6. Pour a small amount (about 20ml) of cold water into the bottom of the baking tray. This will help to keep the chicken moist, and make life easier for you when you come to make the gravy.
6a. No need to cover the meat, just pop the tray into a pre-heated oven at 180C/360F degrees for about 40 minutes or until the juices run clear. The skin will be dark, and slightly crispy.
If you have a meat thermometer you can stick the probe into the thickest part of the largest breast and then forget about it until it beeps. This is my favourite way to cook. Make sure to do a spot-check on the other breasts too though- salmonella is a nasty illness.
Side Note: A poorly defrosted chicken curry led to salmonella the day before I went to see the Red Hot Chili Peppers in 2005. Six hours on a train and a day in the middle of Phoenix Park at the height of summer probably wasn't the best cure but there was no way I was missing the concert!
7. Once you've taken the meat out of the roasting tray, you can add a little hot water (~100ml) to the juices at the bottom of the tray to make a gravy. Whisk for a couple of minutes over a medium heat until blended.
If your oven tray isn't suitable to sit directly on the hob, scrape the juices into a small saucepan then add the water.
8. If you need to thicken the gravy, add a small amount of low carb-friendly Xanthan Gum while whisking. I'll usually start with a 1/2 teaspoon to begin with, and add more as/if needed.
Serve with Cauliflower Mash and your favourite veggies.
Saturday, 11 January 2014
Chargrilled Chicken Skewers
For that barbeque-in-your-kitchen feeling in the middle of January, give these Chargrilled Chicken Skewers a go. They are tasty enough to have on their own, or you can dress them up with coleslaw and mixed leaves.
You can let the chicken marinade for a while if you like, but it's really not necessary. I made these tonight and it took me a little more than half an hour from start to finish.
I picked up four good size chicken fillets for about a fiver at O'Sullivans in The English Market today. This 4-fillet recipe serves two low-carbers, but you could probably feed four with it if you wanted a carby side dish.
I'll always serve this with a spoonful of soft cream cheese (like philadelphia) and a dash of spicy sriracha sauce- the one from Marks & Spencer's Modern Asian range is gorgeous.
Ingredients
4 Chicken fillets
3 Bell (capsicum) Peppers -three different colours allow for different flavours & great colour
1 Red Onion
Olive Oil
Schwartz Chargrilled Chicken Seasoning (peppers, garlic, parsley)
Method
Preheat the oven to 200/395 degrees.
1. Dice the chicken into slightly larger than bitesize pieces. Place in a bowl and drizzle with about three tablespoons of olive oil. Stir to ensure the chicken is well covered with oil.
2. Sprinkle over with the seasoning mix, and stir to evenly coat the chicken.
3. Let the chicken sit, and get to work chopping your peppers into large chunks. I've written a post about the best way to chop peppers here.
4. Chop the red onion into large chunks by peeling and halving it. Now half both pieces again
5. Start building up your skewers by alternating the veg and chicken- I like to put the piece of red onion in the centre of each skewer, but that's probably just my OCD. Sitting the skewers across a roasting dish is a pertty handy way to neatly put them on the oven.
6. Leave the skewers in for about 25 minutes, until the chicken has slightly browned and the peppers are soft and juicy.
7. Holding one end of the skewer (with a glove/ towel), use a fork to slide the chicken and veg down onto your plate.
Serve straight away!
Friday, 10 January 2014
Burgers With Goats' Cheese
Formerly of The English Market, Iago opened up a shiny new store on Prince's Street just before Christmas. I popped in yesterday and picked up a small log of goats' cheese for €1.95. Bargain.
When I lived in Dublin I would get a burger topped with goats' cheese whenever I was in Jo Burger, and as soon as I saw the cheese I knew that's what I would make for dinner tonight. The recipe below makes four burgers, and serves two low-carb people. If you're a carb-eater and want to have burger buns/fries, one burger will be enough per person.
Ingredients
1 lb Minced steak
1 Egg
2 Tablespoons of almond flour
Salt & black pepper
100g Goats' Cheese
10 Asparagus Spears
200g Spinach Leaves
Method
1. Put the asparagus and spinach on to steam. You'll want to steam them for about 15 minutes so you can pretty much forget about them while you're getting the burgers ready.
2. Mix the beef, egg, almond flour, salt & pepper together in a bowl. The egg and almond flour will help the burger to bind well and stay together.
3. Use your hands to form the mixture into a ball, half it, and half it again. Each quarter will now make a good-size burger.
4. Form each quarter into a ball by rolling it in your palms, then flattening the ball between your hands.
5. Spread the four burger patties out on a grill tray, and use your finger to make a small dent in the middle of each one. Don't go right through the meat, just make a small dent. This stops the burger from swelling up in the middle and allows them to cook through evenly.
6. Put the burgers until a medium-heat grill for about 6 minutes each side for a slightly pink centre.
7. Once the spinach has wilted and the asparagus is tender, take it off the heat and allow to stand.
8. Once the burgers are cooked, flip them back over to the side you cooked first, and sprinkle some goats' cheese on the centre of each burger.
Goats' cheese is great to put under the grill as it doesn't drip everywhere when it melts. Give it another minute or so, until the cheese starts to brown slightly.
9. Serve immediately.
Pro Tip: Ballymaloe Relish is the perfect sauce to have with these burgers.
When I lived in Dublin I would get a burger topped with goats' cheese whenever I was in Jo Burger, and as soon as I saw the cheese I knew that's what I would make for dinner tonight. The recipe below makes four burgers, and serves two low-carb people. If you're a carb-eater and want to have burger buns/fries, one burger will be enough per person.
Ingredients
1 lb Minced steak
1 Egg
2 Tablespoons of almond flour
Salt & black pepper
100g Goats' Cheese
10 Asparagus Spears
200g Spinach Leaves
Method
1. Put the asparagus and spinach on to steam. You'll want to steam them for about 15 minutes so you can pretty much forget about them while you're getting the burgers ready.
2. Mix the beef, egg, almond flour, salt & pepper together in a bowl. The egg and almond flour will help the burger to bind well and stay together.
3. Use your hands to form the mixture into a ball, half it, and half it again. Each quarter will now make a good-size burger.
4. Form each quarter into a ball by rolling it in your palms, then flattening the ball between your hands.
5. Spread the four burger patties out on a grill tray, and use your finger to make a small dent in the middle of each one. Don't go right through the meat, just make a small dent. This stops the burger from swelling up in the middle and allows them to cook through evenly.
6. Put the burgers until a medium-heat grill for about 6 minutes each side for a slightly pink centre.
7. Once the spinach has wilted and the asparagus is tender, take it off the heat and allow to stand.
8. Once the burgers are cooked, flip them back over to the side you cooked first, and sprinkle some goats' cheese on the centre of each burger.
Goats' cheese is great to put under the grill as it doesn't drip everywhere when it melts. Give it another minute or so, until the cheese starts to brown slightly.
9. Serve immediately.
Pro Tip: Ballymaloe Relish is the perfect sauce to have with these burgers.
Labels:
asparagus,
burgers,
English Market,
goats cheese,
keto,
low carb,
spinach
Thursday, 9 January 2014
Feta, Olives & Peppers
One of the biggest challanges in switching to a low-carb diet is dealing with snacking habits.
While it's true that you feel full most of the time, there are times when you sit down to watch some TV and feel like having something to nibble on.
One of my favourite snacks is a mix of feta cheese, black olives and peppers from The Real Olive Company in The English Market. You can get one large scoop for about €3.50, and it goes perfectly with a glass of red wine.
While it's true that you feel full most of the time, there are times when you sit down to watch some TV and feel like having something to nibble on.
One of my favourite snacks is a mix of feta cheese, black olives and peppers from The Real Olive Company in The English Market. You can get one large scoop for about €3.50, and it goes perfectly with a glass of red wine.
Friday, 13 December 2013
Fillet Steak
Tonight I made fillet steak with some simple sides of steamed broccoli, cauliflower and carrots. I picked up the steak on my way home through The English Market, though for the life of me I can't remember which stall I settled on! I've outlined what I think is the best way to cook steak here.
Also pictured is Le Froglet Shiraz from M&S. It's a light, easy to drink wine which is perfect with steak. Le Froglet is great value for money at only €7, though it definitely benefits from decanting.
Friday, 29 November 2013
Steak
When I lived in Poland, there was this twee Wild West themed steak restaurant in the centre of Łódź. A group of us would go there at least once a fortnight, and sit in Little House On The Pairie-style covered wagons for the sake of their blue cheese steak. It was a wonder.
The cold weather's been making me nostalgic, so tonight I made striploin steak with blue cheese sauce, asparagus and tomatoes. Though there were no wagons or racially insensitive costumes involved.
Below I'll outline what is the absolute best method of cooking steak I have come across, which S picked up from Tim Ferris' book The 4 Hour Body.
Firstly, get the best possible cut of meat you can afford. I know that sounds very Jamie Oliver, but it really is true. Spending even an extra euro will make such a difference.
If you can, go to a butcher and choose your own piece of meat, tell him/her how thick you want it cut.
I think fillet is the best cut of steak, hands down. However, it can be expensive. In that case, striploin is your guy. It's a great cut of steak for frying. It's generally lean, with just enough fat to give the meat some flavour. Ribeye is also a good cut, but tends to have a lot of fat running through it.
I got two gorgeous slices of striploin at Bresnan's in The English Market- they've been trading there since 1898! It was about €13, but in my defence they were very thick slices- easily an inch. Plus, it's not the kind of thing you're going to make every day.
Pretty much the whole meal was purchased in The English Market, apart from the cream. The asparagus and tomatoes came from Superfruit, and the Cashel Blue cheese I used for the sauce was from On The Pig's Back.
Pro-Tip: The meat should be fully at room temperature before cooking. Take it out of the fridge about 30 minutes before you start.
Ingredients
1 Slice of Striploin Steak per person
Sea salt & Pepper
Olive oil
5 Spears of Asparagus per person
1 bunch of cherry tomatoes on the vine (about 4 per person)
50ml Double Cream
50g Blue Cheese- I used Cashel Blue but Roquefort would work too
1 White Onion, chopped into rings or long pieces
Method
1. Preheat the oven to about 220/430 degrees.
2. In a roasting tin, place the tomatoes and asparagus. Drizzle with a small amount of olive oil and sprinkle with a little salt. Put them into the oven.
3. Get out your frying pan and put it on a high heat. I use a heavy-bottom cast iron pan as this stays evenly hot. Allow the pan to heat but don't put any oil in it.
4. Pat the steak dry with some paper towel. This sounds weird, but it will make a difference. What you are doing is drying the moisture off the surface the steak so it won't steam once it hits the pan.
5. Season the steak with sea salt, pepper and olive oil. Put it on both sides and massage it in little bit.
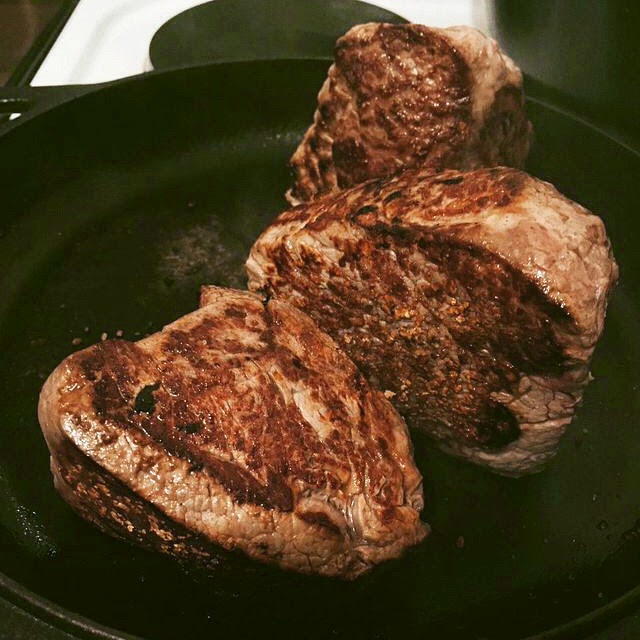
6. As soon as the pan is very hot, drop your piece of steak onto it. Let it sit in the same place for 2 minutes (time it, seriously!) and don't move it around the pan. Because you have oiled the steak, it shouldn't stick to even an average quality pan.
7. After two minutes, flip it over and do the same to the other side. It should look a little something like this:
The cold weather's been making me nostalgic, so tonight I made striploin steak with blue cheese sauce, asparagus and tomatoes. Though there were no wagons or racially insensitive costumes involved.
Below I'll outline what is the absolute best method of cooking steak I have come across, which S picked up from Tim Ferris' book The 4 Hour Body.
Firstly, get the best possible cut of meat you can afford. I know that sounds very Jamie Oliver, but it really is true. Spending even an extra euro will make such a difference.
If you can, go to a butcher and choose your own piece of meat, tell him/her how thick you want it cut.
I think fillet is the best cut of steak, hands down. However, it can be expensive. In that case, striploin is your guy. It's a great cut of steak for frying. It's generally lean, with just enough fat to give the meat some flavour. Ribeye is also a good cut, but tends to have a lot of fat running through it.
I got two gorgeous slices of striploin at Bresnan's in The English Market- they've been trading there since 1898! It was about €13, but in my defence they were very thick slices- easily an inch. Plus, it's not the kind of thing you're going to make every day.
Pretty much the whole meal was purchased in The English Market, apart from the cream. The asparagus and tomatoes came from Superfruit, and the Cashel Blue cheese I used for the sauce was from On The Pig's Back.
Pro-Tip: The meat should be fully at room temperature before cooking. Take it out of the fridge about 30 minutes before you start.
Ingredients
1 Slice of Striploin Steak per person
Sea salt & Pepper
Olive oil
5 Spears of Asparagus per person
1 bunch of cherry tomatoes on the vine (about 4 per person)
50ml Double Cream
50g Blue Cheese- I used Cashel Blue but Roquefort would work too
1 White Onion, chopped into rings or long pieces
Method
1. Preheat the oven to about 220/430 degrees.
2. In a roasting tin, place the tomatoes and asparagus. Drizzle with a small amount of olive oil and sprinkle with a little salt. Put them into the oven.
3. Get out your frying pan and put it on a high heat. I use a heavy-bottom cast iron pan as this stays evenly hot. Allow the pan to heat but don't put any oil in it.
4. Pat the steak dry with some paper towel. This sounds weird, but it will make a difference. What you are doing is drying the moisture off the surface the steak so it won't steam once it hits the pan.
5. Season the steak with sea salt, pepper and olive oil. Put it on both sides and massage it in little bit.
6. As soon as the pan is very hot, drop your piece of steak onto it. Let it sit in the same place for 2 minutes (time it, seriously!) and don't move it around the pan. Because you have oiled the steak, it shouldn't stick to even an average quality pan.
7. After two minutes, flip it over and do the same to the other side. It should look a little something like this:
8. Give it another two minutes on the second side, and then you can use tongs to turn it on its pink edge for about 30 seconds. This will caramalise all the edges.
8a. If you're doing another slice of steak, repeat the process- 2 minutes on either side. Don't wash the steak pan, you'll need it for the sauce.
9. Turn the oven down to about 100/220 degrees.
10. Place the steak on some tinfoil on an oven tray. I like to fold up the edges of the tinfoil to create a little box to catch any juices which may run off. You can add these to the sauce later. If you have a meat thermometer stick it into the centre of one of the slices.
10a. For a medium steak I like to let the internal temperature get to about 58-60C (140F) degrees. This takes about 15 minutes. Add another 5 minutes if you would like it well done.
11. Now, get to work on your sauce. Using the steak pan, add a little more oil if needed and begin to fry off the onions.
12. Once the onions have begun to soften, add the cream. Stir. Crumble in the blue cheese and allow to simmer over a low heat, stirring occasionally. Once the sauce has reached a desired thickness (about 5 minutes), take it off the heat. It should look something like this:
11. Once your thermometer beeps (or 15 minutes has passed, you cretin!) then it's time to get that meat out of the oven. Here's what my medium steak looks like:
Pro Tip: Make sure to let the steak stand for five minutes before you cut into it, this will stop all the juices from escaping immediately.
12. The asparagus and tomatoes can come out now too. The tomatoes should be bursting from their skin and the asparagus should be on the softer side of al dente.
13. Dish out the steak and vegetables.
14. Put the cheese sauce back on the hob (you probably don't even have to turn the ring back on, the residual heat should be enough), and add in any delicious meat juices which were collected in the tinfoil.
15. Stir and allow to blend, then you can devour.
Labels:
asparagus,
blue cheese,
English Market,
keto,
low carb,
steak,
tomato
Subscribe to:
Posts (Atom)